With the transition to the high definition format the Blu-ray discs were introduced as the optical disc of choice for movie distribution. However even though a BD-50 Blu-ray disc can hold up to 50GB of data, this huge storage increase is not the only reason behind improved HD quality. The even bigger change was the move from MPEG-2 codec DVDs use to the MPEG4 AVC codec which allows greater quality in less space. As a result, you can copy a movie in a BD-50 disc to the much cheaper BD-25 disc using Blu-ray recorder or even to a BD-9 (using a dual layer DVD and a simple DVD recorder) and only lose a bit of the original quality.
In this guide we will use BD Rebuilder in order to copy a Blu-ray movie after recoding it in order to fit into a smaller disc. You can download BD Rebuilder from the link below, and if you don't already have them, AviSynth, FFDSHOW and Haali Matroska Splitter as they are needed for BD Rebuilder to work.
Step 1
Before starting the recoding process with BD Rebuilder you need to use an unlocking software to circumvent the Blu-ray's protection. I really suggest you let AnyDVD HD do that job. You can download it here. Another good idea would be to rip the whole disc to the hard drive first. Read this guide to find out how you can do that.Step 2
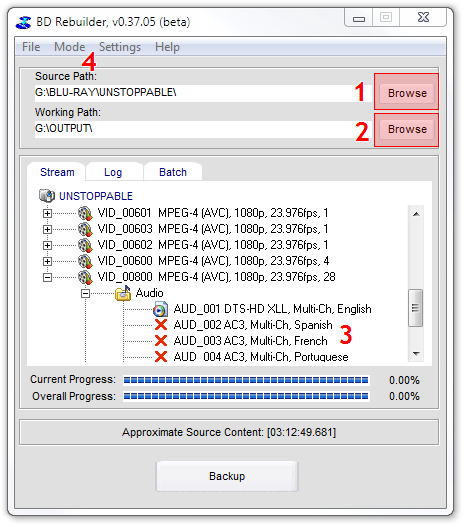
Open BD Rebuilder. Browse (1) to your Blu-ray drive or preferably the folder your ripped your Blu-ray disc in. Then browse (2) and select the working path (you need to have more than 50GB free in that drive). By double clicking an audio stream (3) you can remove the ones you don't need (it's not necessary but it's recommended to remove some, especially if you plan to use a BD-9). Next click the Mode (4) menu.
Step 3
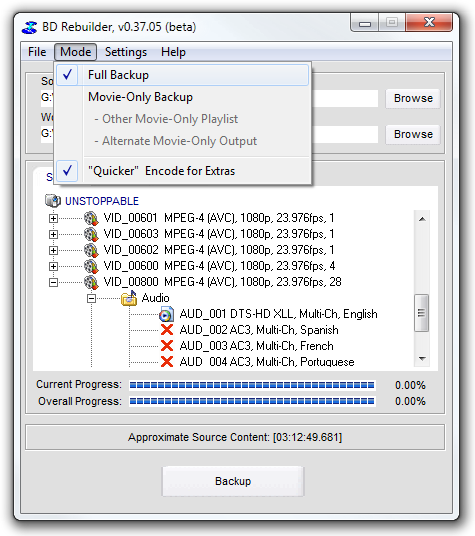
In the Mode menu, you can select Full Backup if you want to keep the all the video titles and the menu of your Blu-ray. Movie-Only Backup will only keep the movie while "Quicker" Encode for Extras will use a faster encoding setting for the extras, resulting in lower quality but less time. To continue select Settings -> Setup.
Step 4
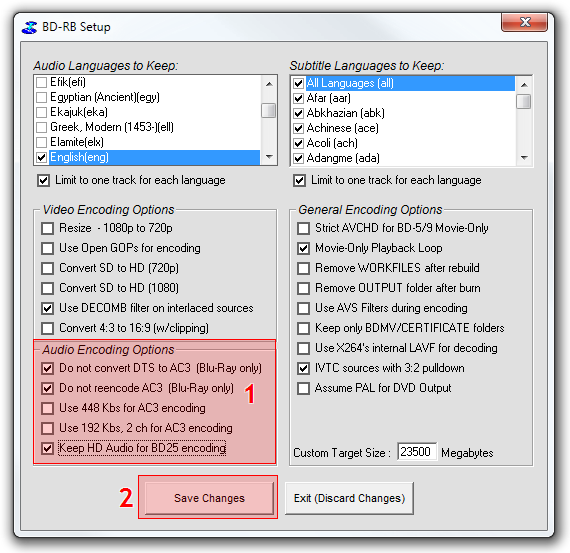
Default settings usually work OK for most projects. The three settings you can see selected in the audio encoding (1) options are worth mentioning though, in order to keep the maximum audio quality if you have a nice 5.1 (or better) surround setup. Select the settings you want and click Save Changes (2).
Step 5
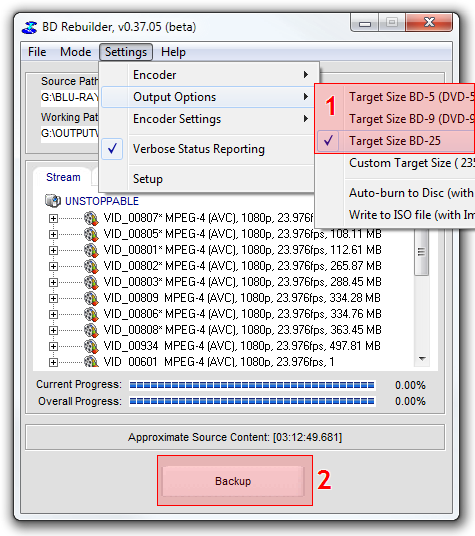
In addition, in the settings menu, you can select the output size (1) between BD-5, BD-9 and BD-25. The first two, are actually using a DVD disc, regardless the BD- part, and not a Blu-ray disc so make sure your Blu-ray player supports them (if AVCHD support is mentioned there is a good chance it will). Keep in mind we are still creating a Blu-ray disc and not a DVD, so even though you'll be using a DVD recorder and DVD media this does NOT mean that you are creating a DVD video disc. You still need a Blu-ray player.
If you have a Blu-ray recorder and not mind the extra media cost, use BD-25 for an excellent backup. Otherwise I suggest using BD-9 but be ready for some quality drop (still much better than a DVD video though).
I suggest you check the output before you burn the Blu-ray using ImgBurn, so disable Auto-burn and if you need it, read this guide to learn how to burn your Blu-ray. Click Backup (2) to start the encoding process.
Step 6
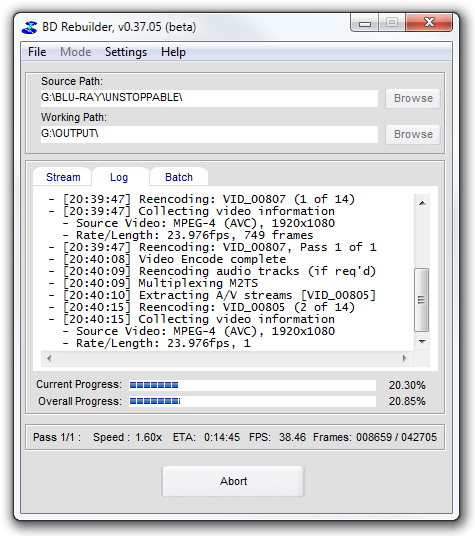
That's it. A few hours later your Blu-ray files will be ready for burning.


Comments
ANgel