This guide is pretty old and the information is outdated. You can read a new article about this matter here.
Many people are asking me how to put 2 or more movies to one DVD or how to add titles from different DVDs into one recordable disc, so I decided to write this series of guides dealing with that. Note that I do not suggest to use one disc for more than two movies. Even with two movies in one disc, YOU ARE going to see a big difference in quality from the original. If the movies are both over 100 minutes, I suggest you don't join them to 1 disc.
Of course as I always say, try and see, maybe you find the quality OK, and continue using this method. Before you start be sure that you have ripped all the DVDs you want to use in your hard disk (guide here). If you have already done so, start reading the guide!
![]()
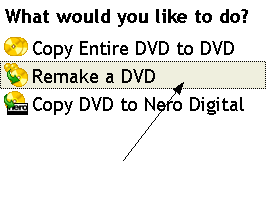 |
First of all open Nero Recode 2. In the first menu, select Remake a DVD. |
![]()
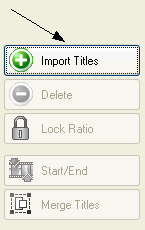 |
The main window of Nero Recode 2 opens. Select Import Titles. |
![]()
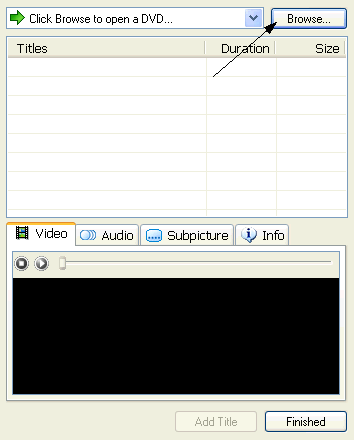 |
Click Browse to find the folder that you have the DVD files in. |
![]()
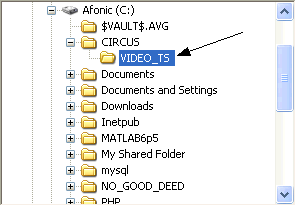 |
Locate the first DVD folder you should have in your hard disk and select the VIDEO_TS folder or the folder you have all the DVD files in (make sure you have different folders for different DVDs!). |
![]()
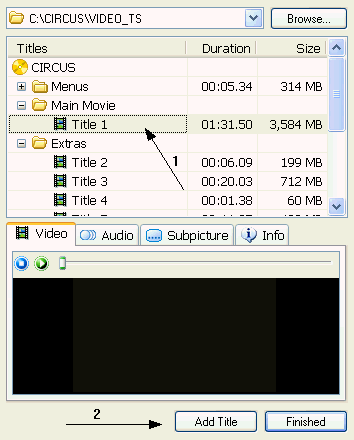 |
Recode will analyze the DVD. After it's finished you'll see something like this. Just select the titles you want (1) and click Add Title (2) to add them in the project. You can use the small preview window to check out what every title contains. After you're done with this DVD click Browse again and select the folder of the second one. Follow the same steps to add as many titles you want from as many DVDs you want. When you're done click Finished. |
![]()
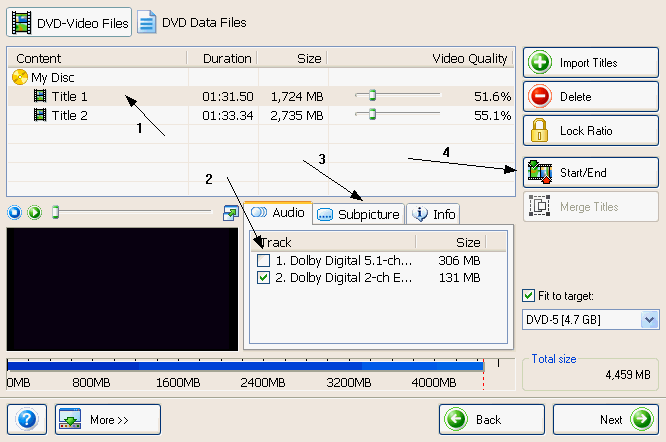 |
Now select the first title. (1) Then remove all the audio tracks you don't want and leave only one (2). Be sure you do that, especially if you want to add two movies into one disc, it saves a lot of space. Also remove the unwanted subtitles (3). Repeat the same for the other titles as well. Again, if you are adding two movies into 1 disc click Start / End (4) and see the next step for details. If you are not just skip the next step and click Next. |
![]()
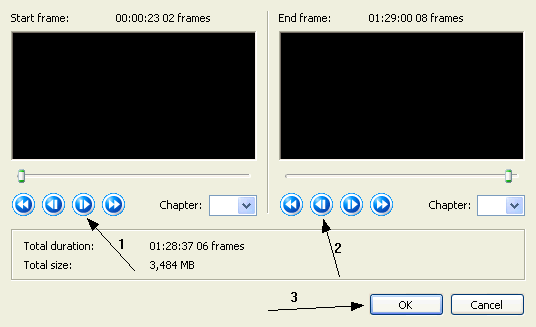 |
Here using the forward (1) and backward (2) button remove all the introduction screens and credits to save space. Then click OK and when you're back to Recode's main window click Next. |
![]()
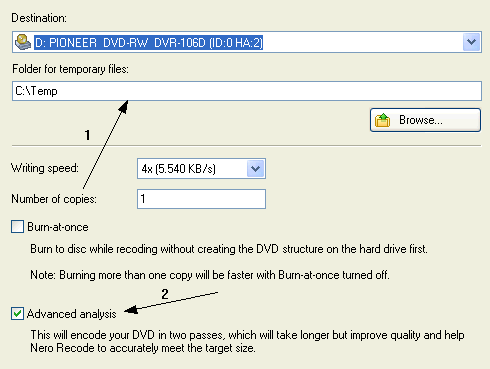 |
We are finally in the burn options. (1) select the destination and the temp folder. Make sure that if you join two movies into one disc you select Advanced analysis (2). It may take some more time, but the quality will be improved. Finally click Burn and you are set! |


Comments
;-);-);-);-);-);-);-);-);-);-);-);-);-)