This guide is here to show you how
to back-up a DVD-9 to a single DVD±R disc. The program we are going
to use is DVD Shrink 3, a freeware program. What this program does is re-encoding
the video of the original DVD which is about 5-7GB so that it fits into a
DVD±R which is just 4,7GB. If your original DVD is 4,7GB or less then
you should use the DVD-5 To DVD±R using DVD Decrypter guide which
you can find here.
As usual download DVD Shrink from our tools download section here and
proceed with the guide!
Note: Version 3.1.x of DVD Shrink is also available, I suggest you use this one instead. The guide is here.
![]()
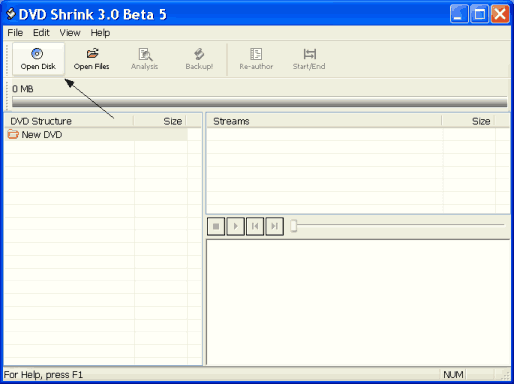 |
This is the main window of DVD Shrink 3.0. Nice isn't it? Just click to open disc. |
![]()
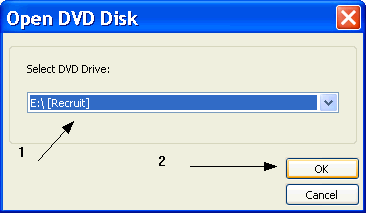 |
Here the things are simple, just select the right drive that contains the DVD with your movie (1) and then click OK (2). |
![]()
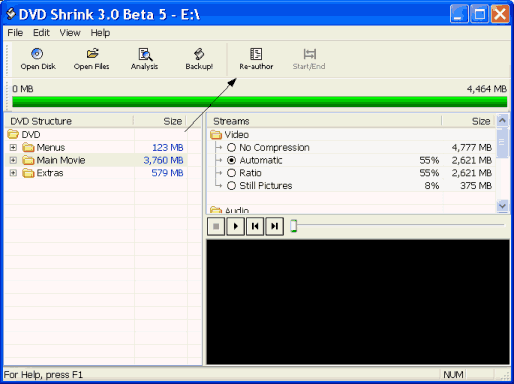 |
After the small analyzing the movie is ready. As you can see at the left the menus and the extras are also included. We want to keep only the movie so click Re-author. Note here that I strongly recommend to follow the guide and get rid of the special-extras. Is is because if you keep them the quality of the main movie will be poor and we don't want this. Note: If Compression is 100% (where it says 55%) and the bar is all green you don't need to use this guide, select the DVD Decrypter guide you can find here. |
![]()
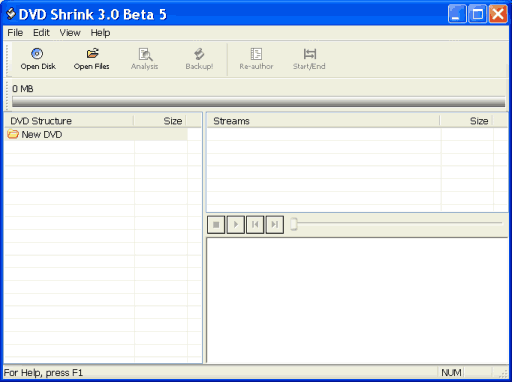 |
A new window of DVD Shrink opens when we click Re-author but the old one is not closed. Open the other window also and keep them both open. |
![]()
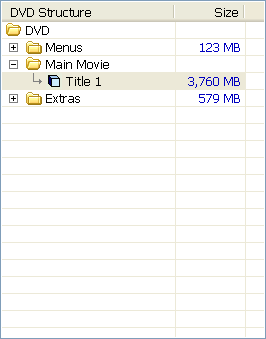 |
At the window where we opened the movie (the first one) open the Main Movie Tab. Then select the Title 1 (or the biggest one if there are more that one) and "drag and drop" to the new window, like you copy a file from a CD to your disk. |
![]()
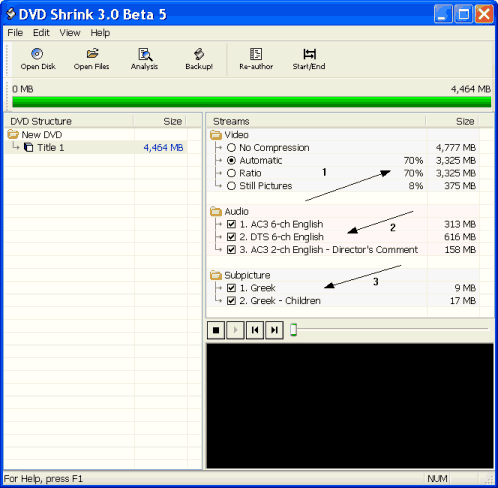 |
The main window should look like this. (1) Note that DVD-Shrink automatically selects the compression of the video so that it fits into a DVD±R. But 70% is much and we want to reduce the compression as much as possible in order to achieve better quality. Then we see the Audio stream (2) and the subtitles (3), and we de-select the ones that we don't want to keep. Greek subtitles and AC3 6-ch English are enough so we uncheck the other two.
|
![]()
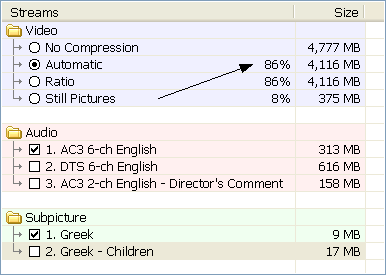 |
We unchecked them and we see that the value at the compression is now 86%. This is good but lets see if we can achieve a better quality. |
![]()
| Lets try something else. Select the Start/End button. |
![]()
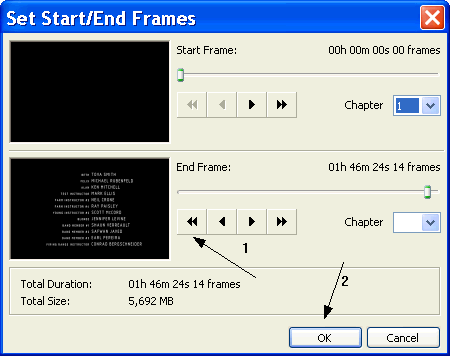 |
We are going to get rid of the credits. I don't think that you see the credits do you? Anyway if you want to keep the credits ignore these two steps. But removing them leaves space on the DVD for our movie. To remove them click button (1) until the video preview on your left shows the start of the credits. When you are at the point where you know that you don't need anything else beyond it, just click OK. |
![]()
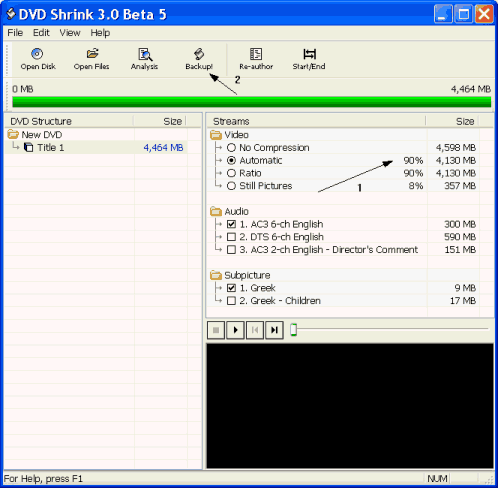 |
Have a look now. (1) The compression is just 90%! Our movie is going to have a great quality! Now click Backup! (2) |
![]()
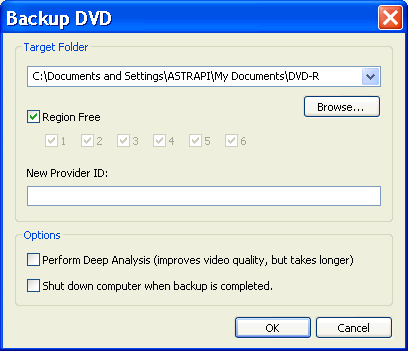 |
Here just select the folder you want to put the files in (I suggest it's an empty one) and click OK. If you want you can select to Perform Deep Analysis but as it says it will take longer. (about three times the times. |
![]()
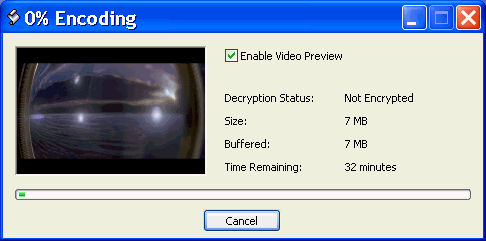 |
So just relax and wait for it to finish. It shouldn't take more than 15-40 minutes. After it finishes burn the files with a program like Nero. If you are not sure about how to burn the files click here to read our guide about creating a DVD-Video disc with Nero and here with CopyToDVD. Finally click here to read how to burn a DVD-Video using freeware tools ImgTool and DVD Decrypter. |

