This guide will show you how to
encode your DVDs to SVCD. SVCD uses MPEG2, the same compression like DVD
and can offer very good picture quality, not as great as the DVD, but much
better than the MPEG1 - based VCD. In the other hand this good quality needs
a lot of space so you will usually need 3-4 CDs to write a SVCD movie in.
Please follow
the instructions exactly as shown here. A small change
at the settings can have a big effect at your video.
Always use the programs you can download from here,
as different versions may not work right.
![]()
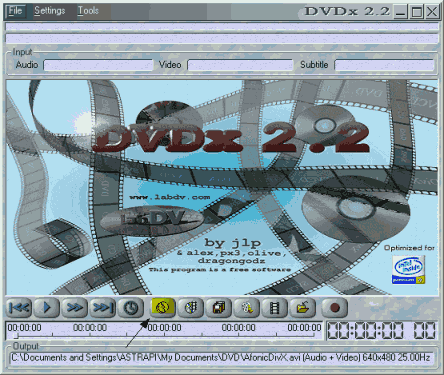 |
This is DVDx 2.2, a very nice and free program. First click at the highlighted icon to select the source of the video wo want to encode. |
![]()
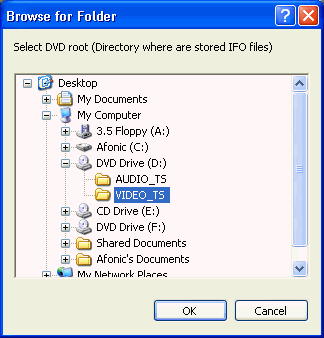 |
Now we select the VIDEO_TS folder of the DVD we want to rip. Sometimes DVDx does this automatically for us so we proceed to next step. |
![]()
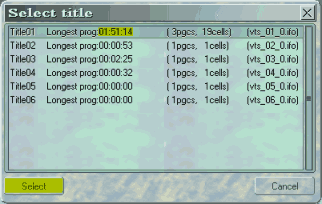 |
Here you have to select the Title which has the BIGGEST length. In our situation it is Title01. Highlight it and then click select. Don't worry about the other ones, they are just intros,extras or ads of the movie. |
![]()
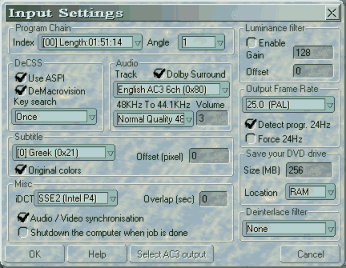 |
After we select the right Title this window comes up. Make sure Angle is set to 1. Check Use ASPI and DeMacrovision. At Key Search once must be OK, if you encounter problems you can try Each VOB ID or Each VOB/CELL ID. At subtitle select none for no subtitle or select the language your want. At Audio select Doldy Surround and select the track you want. At Output Frame Rate select the right values for PAL and NTSC. Also check Forse 24Hz if your DVD is NTSC. At Misc select the Audio / Video synchronisation and select Shutdown the computer when job is done if you want the computer to automatically shoutdown after the encoding. In iDCT use SSE2 if you have a P4, otherwise use FPU. At Save your DVD drive select a big value at the Size, as the ripping takes long and that's not good for your DVD. If you have 512MB of RAM select 256MB at the RAM. If You have 256, 128MB at the RAM. If you have even less select 256MB at the Hard disk. At Deinterlace filter leave None and then click OK. |
![]()
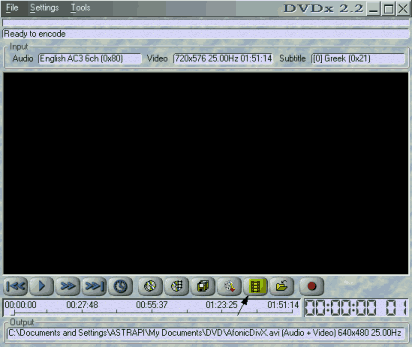 |
This is how DVDx should look afterwards. Now click at the icon that is highlighted. |
![]()
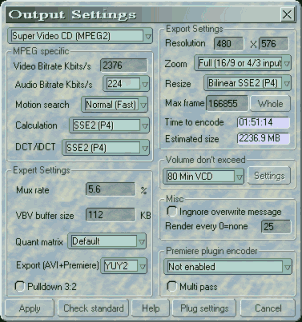 |
In this one just fill in all the values as you see them here. At Calculation and DCT/iDCT use the SSE2 options only if you have a P4, otherwise select Normal at Calculation and FPU at DCT/iDCT. At resize select Bilinear SEE2 for P4 or BiCubic SSE/3DNow. Be sure to click at Whole button and to set the biggest size of your files at 80Min or 74Min CDs so that DVDx cuts your files at the right size. Click apply and proceed. |
![]()
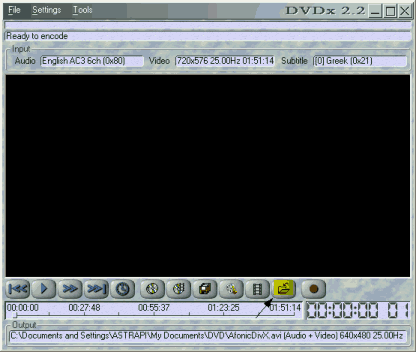 |
Now select the highlighted button to select the target file. |
![]()
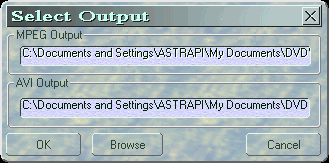 |
Here click Browse and select the folder and the filename of your file and then OK. |
![]()
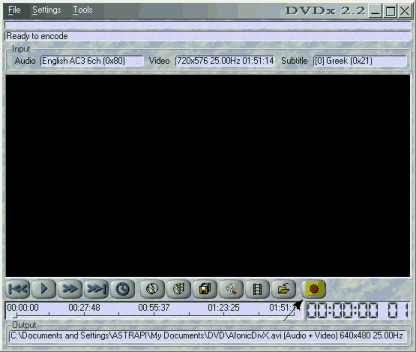 |
The end! Just click the rec button and wait for 4-12 hours depending on the movie's length and your PC's speed. Then you can burn your discs with any burning program like Nero Burning ROM. |

