OK Nero Digital, the new video codec
by ahead software is here, let's see what it has to offer. Nero Digital is
based on MPEG4, as well as DivX and XviD. It offers better picture quality
in same sizes of file and better encoding speed. What I can say so far is
that the encoding speed is awesome! With all settings in Slowest (better
quality) and two-passes Nero Recode 2 (the encoding tool for Nero Digital)
did a little less than two hours (2h !) to do both passes for a 2 hours movie,
while DivX 5.1.1 Pro does a time of 6 hours! In the other hand DivX seems
to have better quality and if we set the Speed/Quality factor in Standard
it does about 3 hours, but has worse picture than Nero Digital.
You can get Nero Digital (for encoding) together with the new version of Nero
Recode, which you can download from the ahead website here.
Note that you should have Nero 6 for them to work.
Nero Recode 2 does not support commercial DVDs (protected) but you can still
use a program like AnyDVD to copy these kind of discs. What I suggest is that
you copy your DVD to the hard disk first (you can find guides at the menu above,
named "DVD To VOB"). That way you save time and your DVD player as
it does not have to work for long. Enough with talking, let's start the guide
now!
![]()
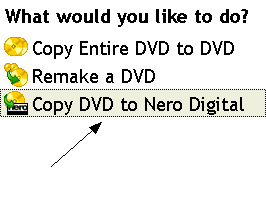 |
Launch Nero Recode 2 and Select
Copy DVD To Nero Digital. Note that we also have a guide for Copy Entire DVD To DVD feature of Nero Recode 2 here. |
![]()
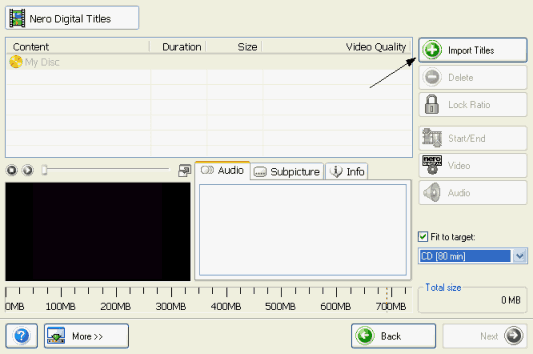 |
This is Nero Recode
main window. We are going to add the DVD we want to encode. Remember
that to use a protected DVD you have to use a software like AnyDVD, or
better rip the DVD to your hard disk first. Click Import Titles. |
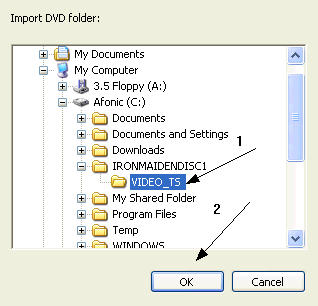 |
Here select the VIDEO_TS folder of your DVD or the folder that contains the files you have ripped (note that you should rip all the DVD and not just the main movie). Select the rigt folder and click OK. |
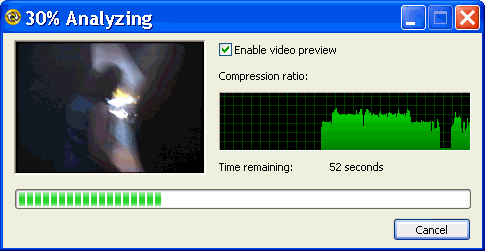 |
Nero Recode will now analyze your video, this should not take more than 1-3 minutes. |
![]()
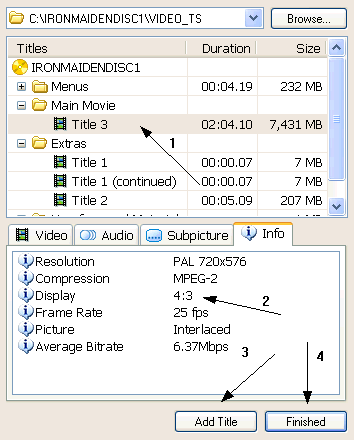 |
After the analyzing a screen like this should come up. Select the Title under Main Movie (1). Then select the Info tab and note the Display Value (2). It should be 4:3 or 16:9. After that select Add Title to add this title in your project. Then select Finshed. |
![]()
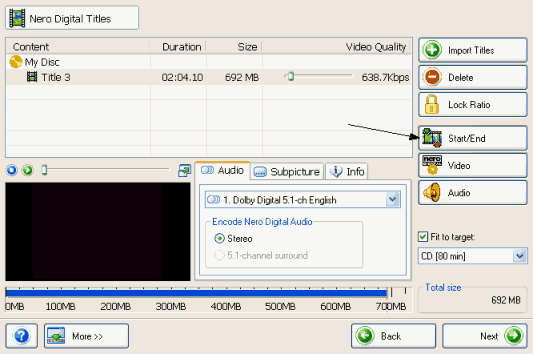 |
After the movie is loaded the main window should look like this. Every MB is important so to save space we are going to remove the credits. Click at the Start/End button. |
![]()
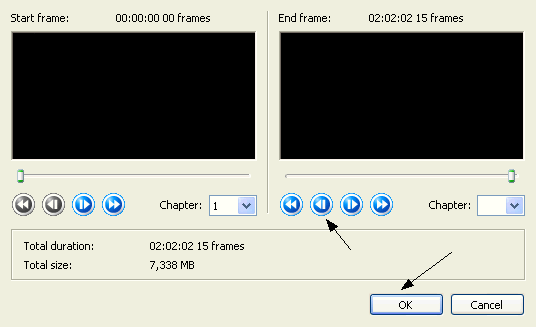 |
Here you have to press the back button (the one that the arrow shows) untill you come to the start of the credits. Then click OK. |
![]()
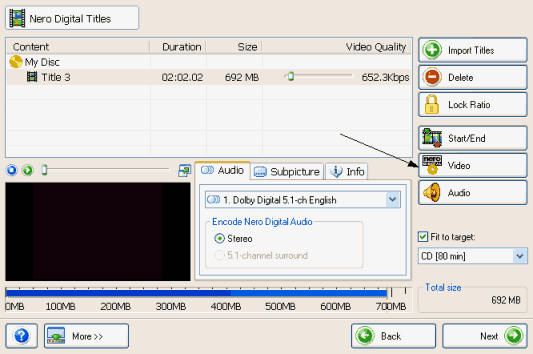 |
Time to set-up some Video options. Click the Video button that the arrow shows. |
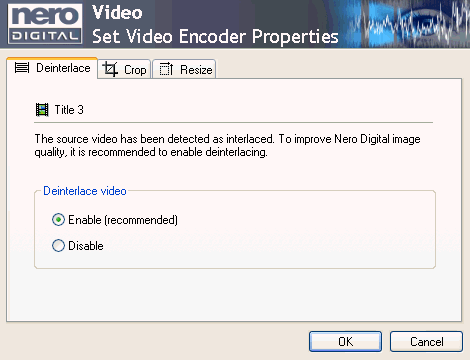 |
First of all make sure Deinterlace is selected. The click the Crop tab. |
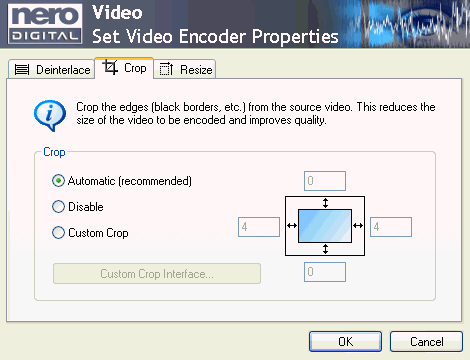 |
Here you can crop the black bars that the movie may have so that you can get better quality. Automatic usually works well, if you are experienced with that kind of stuff you may have to use Custom. Finally click on Resize tab. |
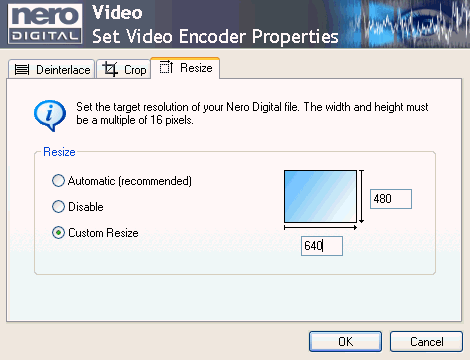 |
Here select
Custom Resize and use the following values: Finally click OK. |
![]()
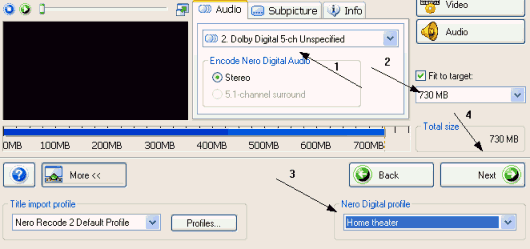 |
(1) First of
all select the right audio track. Also check the Subpicture tab to
select the right subtitles. |
![]()
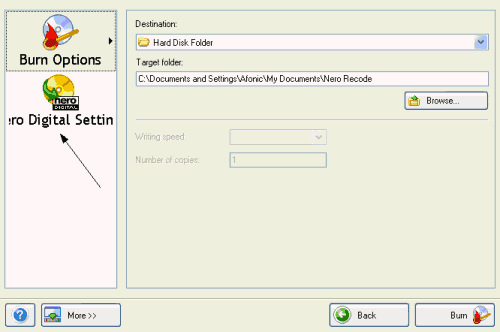 |
Here select the save the file at a Hard Disc Folder and then click on the Nero Digital Settings. |
![]()
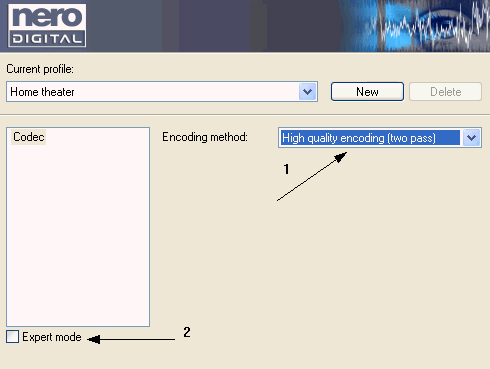 |
(1) Select High
quality encoding (two pass). After that select the Expert mode box (2). |
![]()
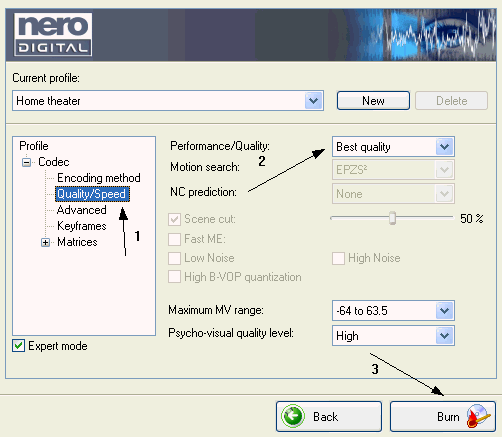 |
Here select Quality / Speed (1) and select Best quality at Performance / Quality (2) menu. Finally click Burn. |
![]()
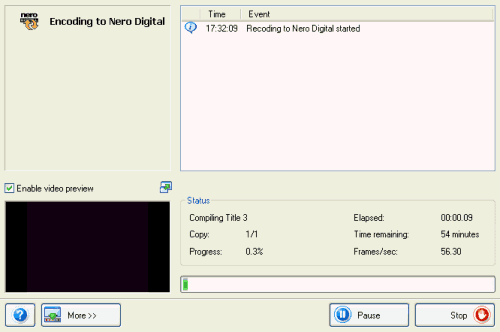 |
The encoding will now start. Wait for it to finish and then enjoy your Nero Digital video! |


Comments
first of all, why does nero vision not even accept its own file format (mp4), and second of all, since nero vision does not accept that format is there a way to burn mp4 to dvd, even if you have to convert it first??
please help...thanks!
can anyone help with this