This guide will help you capture the video from your DV camera and convert it to DVD. What you need, except of course your DV camera and a DVD burner, is a firewire (IEEE 1394) port in you PC. Maybe you have a port like on your motherboard, if not, you need to get an add-on PCI card, which is not very expensive. Also you need a Firewire cable. This may be included with your camera, if not you'll have to buy one. After you have all these, connect your DV camera with your PC (it's plug and play, no need for restart, just like USB) and wait until windows recognise it. Normally you will need no drivers for the camera. When you are sure that everything works OK, we can start this guide.
If you have any problems with loading of the DV files download and install a DV codec from here. I suggest you do it even if you have no problems. Just unpack, right-click on the INF file and select install.
![]()
 |
We are going to use a small freeware program, called WinDV for capturing, as what really happens is not capture but a digital data transfer from the camera to the PC. Download it here. Load WinDV and click Config. |
![]()
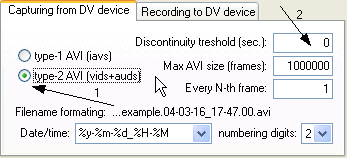 |
Here make sure you select Type 2 as the DV capture type(1). Then set Discontinuity treshold to 0 and Max AVI size to 1000000. (2). Click OK and go back to the main window. |
![]()
 |
Here first of all select the directory you want to put the AVI file in (1) and then select the small box (2). Finally click Capture (3) to start the process. The speed is 1x, so take your time. When capturing of this tape and any others you may have is done we are ready to move to the next phase of the guide! |
![]()
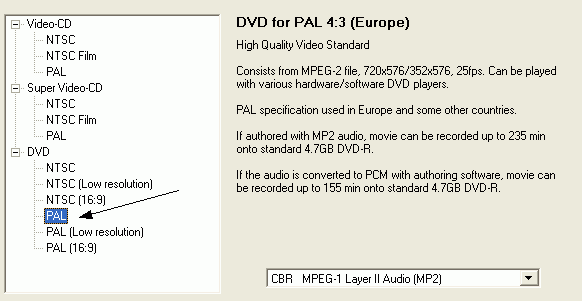 |
Now we need to encode the DV files into MPEG2. If you get any error messages then install these codec. We are going to use TMPGEnc (get it here). Start TMPGEnc and in the wizard select your DVD type (probably 4:3, select NTSC or PAL). Also select MP2 audio and select Next. |
![]()
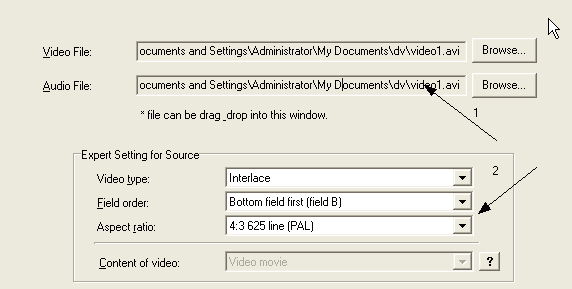 |
In the next screen select the AVI file you have created both as audio and video source (1). In the Expert Setting select the right Ratio (2) and click Next. |
![]()
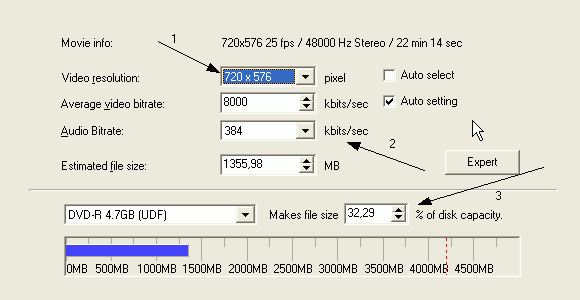 |
Here select 720x576 as the resolution (1). Set the audio bitrate(2) and then the percentage of the disc you want to use (3) (make sure you put the right values if you have more thatn 1 videos as me here). Make sure everything is OK and click Next. |
![]()
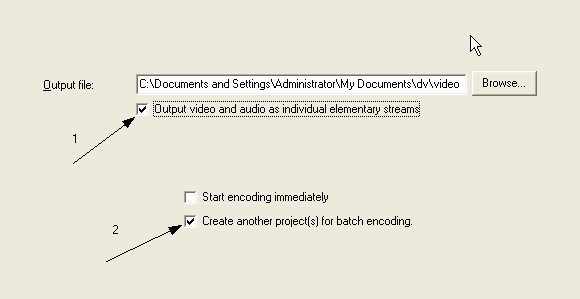 |
Select Output video and audio as individual streams (1) and if you want to encode more than 1 files at the same time Create another project and follow the same steps until you have added all videos. Then from File -> Batch encode start the encoding jobs. The program will create a .m2v video file and a .mp2 audio file. |
![]()
OK after the files are encoded we need to author the DVD (create the IFO, VOB and all other files that a DVD uses) as well as create some menus and chapters. There are many programs around, and keep in mind that you do not need a really expensive one. Some suggestions are:
DVD X Maker (Part of the DVD X Treme Suite) for which you can find a guide here.
TMPGEnc DVD Author which we are going to show here. A more detailed guide can be found here.
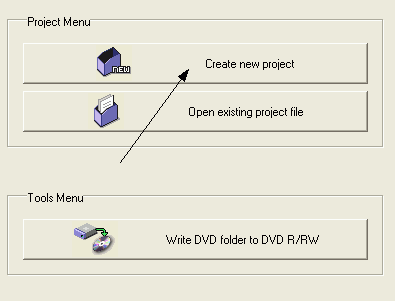 |
OK, we are going to show and example for TMPGEnc DVD Author. Load the program and click on the "Create New Project" button you see in the picture. |
![]()
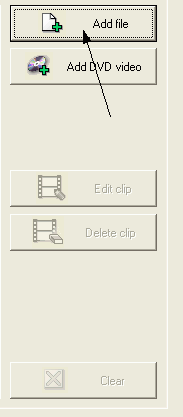 |
After that click on Add Title in order to add the video that we created before using TMPGEnc. |
![]()
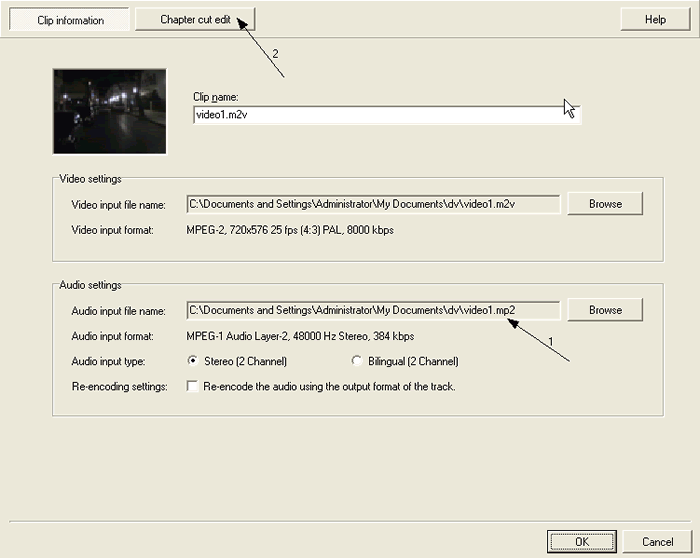 |
OK here click Browse in the Video settings and load the video file (.m2v) we created with TMPGEnc (or the first one of them if they are many). Then click Browse in the audio settings and select the right audio file (1). Leave the rest settings as you see them here. After you're done click on Chapter cut edit (2) on the top of the window. |
![]()
|
OK here we are going to add some chapters. A chapter is the position in a DVD that tells your DVD player where to stop when you click the "Next" button on the control. You can add as many chapters you want, but make sure that they are not too close or too far. To add some chapters click the Add button as you see at the picture in your right. |
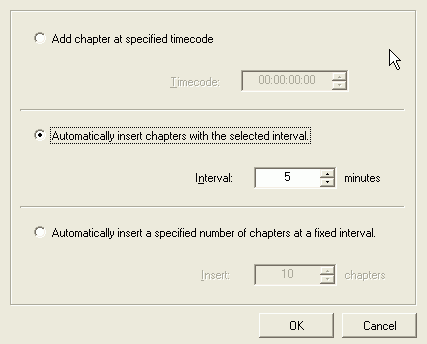 |
Here you can see the available options. I have selected here to add one chapter every 5 minutes. you can set 3, 10 or whatever you like as well as to add a fixed number of chapters. Make your selection and click OK. |
![]()
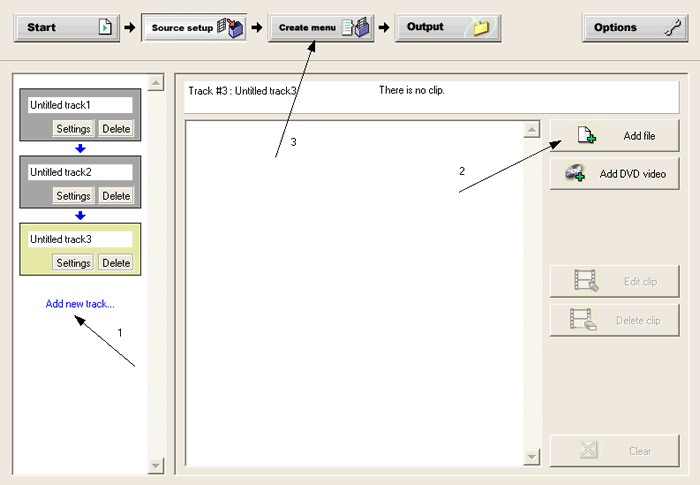 |
Back to the main screen now. Here you can easily add more video that you may have. Just click "Add new track" (1) in order to create a new track and then add a video to it by selecting "Add file" (2) and follow the simple steps that we mentioned just above. Note that you can add more videos in the same track, but adding them to different ones is better for the navigation menu that we will now create by clicking the "Create Menu" button on the top. (3) |
![]()
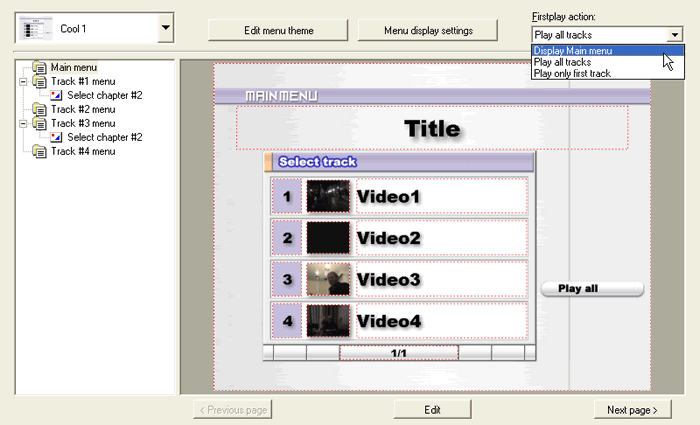 |
Now you can easily create a menu. Just select the theme that you like from the drop-down menu. Then you can change what the text says by double-click on it and add your text so that you can remember what each video shows. Also select Display Main Menu in the Firstplay action in order to make the menu come up first. After you're finished click on Output button! |
![]()
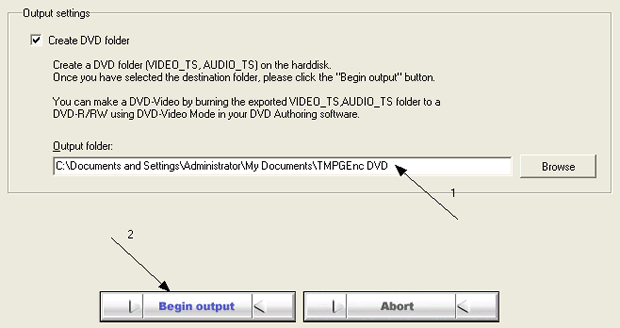 |
Here it's time to create all the files. Select the folder you want to put the files in, it's better that it is an empty one (1). Finally click Begin Output (2) to start. It should not take much time, maybe around 30-40 minutes. |
![]()
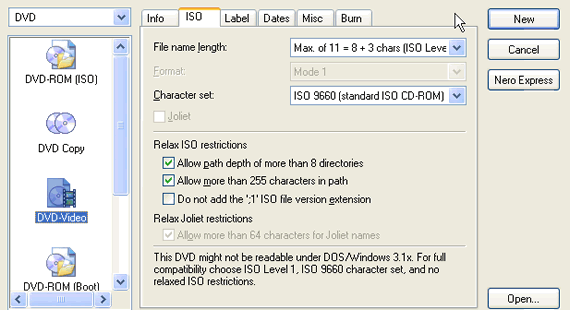 |
Finally you can burn your DVD. You can burn it with TMPGEnc DVD Author as it asks you to burn after authoring is complete. I suggest you do. If you want of course you can use any other program like Nero or CopyToDVD (Nero settings in the picture in your left). You can find a Nero guide here. |


Comments
i'm anshul verma from jabalpur(mp)
when i connect my device it is showing that
"ERROR:device not found"
so can you tell me whats problem does it have?
help me sir
Hi,
iMovie will handle everything fast and easy!
What does the Discontinuity Threshold refer to? The default setting when initially opening WinDV is 1. What is the difference?
Same question about the Max AVI size (frames) setting. The default was 22500.
What does checking the check box to on do?
When you want to finish the capture(transfe r) it seems that you hit the cancel button to get the file to save. Just a minor inconvenience for a great little utility.
Found the answers to the above at:
http://windv.mourek.cz/
gives me the error of "carnt find the dv output pin"
guess i go back to Sony Vegas least that does work
Great and easy guide; well explained
Thnx for sharing this info with us !!
I plug my 4-6 pin firewire cable from my Video camera (Cananon Zr65) into my Maxtor 5000dv... now what? Windows Movie maker does not recognize it. I have no idea how to get WMM to recognize that I have my camcoder plugged into my 'F' drive.
I have my Maxtor plugged in to my PC via USB.